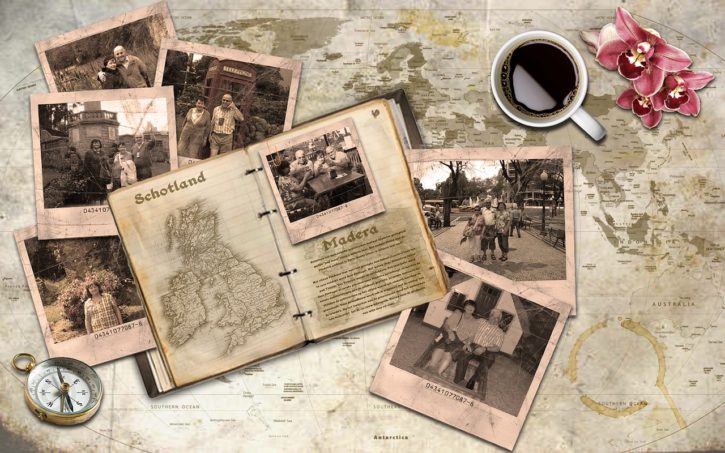
People travel for different reasons that could be wide and varied. Seeing the world take you one step closer to yourself and you come back much wiser and a wider perspective. There is something special about a vacation or a trip, and nothing could be better than preserving those travel memories and document them in a wonderful way. How about making a travel scrapbook every time you come back from a trip?
Well, creating travel scrapbooks is indeed a great idea to document your travel adventures and relive those memories. While most of us have had some experience with scrapbook during school days, you might need help when arranging those pages and photos of your trip in an attractive layout.
Here are some useful tips on how to create a travel scrapbook album, and every travel enthusiast should indeed make a scrapbook of their trip or vacation.
What you’ll need
Before you start scrapbooking, ensure that you have all the tools and equipment you might need for your project. You will need a photo scrapbook, to begin with, plus other tools like scissors, glue, three-ring binder, plastic page protectors, travel stickers, and of course, the travel photos. Make sure to have a good quality pen and adhesives for making the scrapbook album. You can make use of unique items from your holiday and can also create some embellishments.

The design and layouts
This is where the fun part begins, and it always pays if you plan ahead, and a lot will rely on the kind of holiday you have had. Was it a beach vacation or a wildlife trip, or you were out enjoying water sports? Figure out what kind of cover you would want, and then decide how you would like to arrange the photos. It would be ideal to pop on some Flowers svg to brighten the cover. You can always make a rough outline of the layouts of the cover and the inner pages as well.
The photos you want
Before you start, collect the photos that you would want to use in your travel scrapbook album. Depending on the kind and size of the scrapbook, you could use any number of images. However, ensure that there are at least about 20 to 30 pictures or more for your scrapbook to make it both interesting and complete. It is a good idea to pick around 40 to 50 pictures and then decide which photos you love to include in your scrapbook. Remove those which you think are not good enough.
If you have a favorite photo from your trip that you are proud of and want to show it off, give it a central place on the cover of the scrapbook or on the first page. Or you could give it a special place with its own page.
The cover design
Start with the cover, and keep in mind that this is very important. The design of the cover of the travel scrapbook will give the user an idea of what this is about and what to expect inside. For example, a scrapbook on beach vacation could have a cover with designs of seashells and waves while a wildlife trip could be a safari-themed book. A Disney trip could have a Disney-themed paper with characters from the Disney world. Just make sure not to overdo the decorations and carry on the cover theme to the inside of the travel scrapbook.
The introduction page
Once the cover of the travel scrapbook is done, it is time to design the first page, which is the introduction page. You could offer details like info on the destination, the time period of the vacation, and who all went with you for the trip. You can make the page colorful with imagery and pics but without overcrowding the page. Arrange the pictures in collages to create a well-designed page and could also include things like ticket stubs and postcards here.
Get creative and artistic
Now that the cover and the introduction page are taken care of, it is time to move on to the most changing part of making the travel scrapbook, and it is making the inner pages. You can arrange the pictures based on the itinerary of your trip so that they tell a story. Use stickers, glitters, and art to embellish those pages but without overdoing them. It is a good idea to use folded maps for added info. Use whatever takes your fancy and goes with the main theme of the scrapbook.
Give every page a title
Arrange the photos based on the title and in an attractive layout for everyone. Use ideas like a boarding pass, travel stickers, and museum ticket stubs to make every page special, unique and memorable. You can mention the day, the time, and the aim of the day, and it could be snorkeling or hiking or quad biking or more. You can write the date and information beside the picture to mark the event or day.
Keep things simple and personal
As mentioned before, do not go overboard with those embellishments and keep things simple but fun and attractive. Add handwritten notes wherever you feel necessary and write down those memories. Many travel scrapbooks even include a small envelope with additional details about a particular spot. Add some extra personalized touch and visual appeal to the book with trip previews and handmade drawings.
Concluding the scrapbook
Create a wrap-up page once you are done with the travel scrapbook and place some photos and notes that sum up the whole trip. Write a summary of the whole experience and the highlights of the trip, what you loved the most about it. Your words and thoughts should express your true feelings and motivate others to travel.
Let your travel scrapbook inspire you to travel even more and, at the same time, motivate you to document your fondest travel memories every time you come back. While scrapbook might sound old fashioned, but they are indeed a beautiful way to preserve those cherished memories. So, next time you go on a holiday, do not forget to take something from each place that you visit and it would indeed find a special place and mention it in your next travel scrapbook and tell your story.